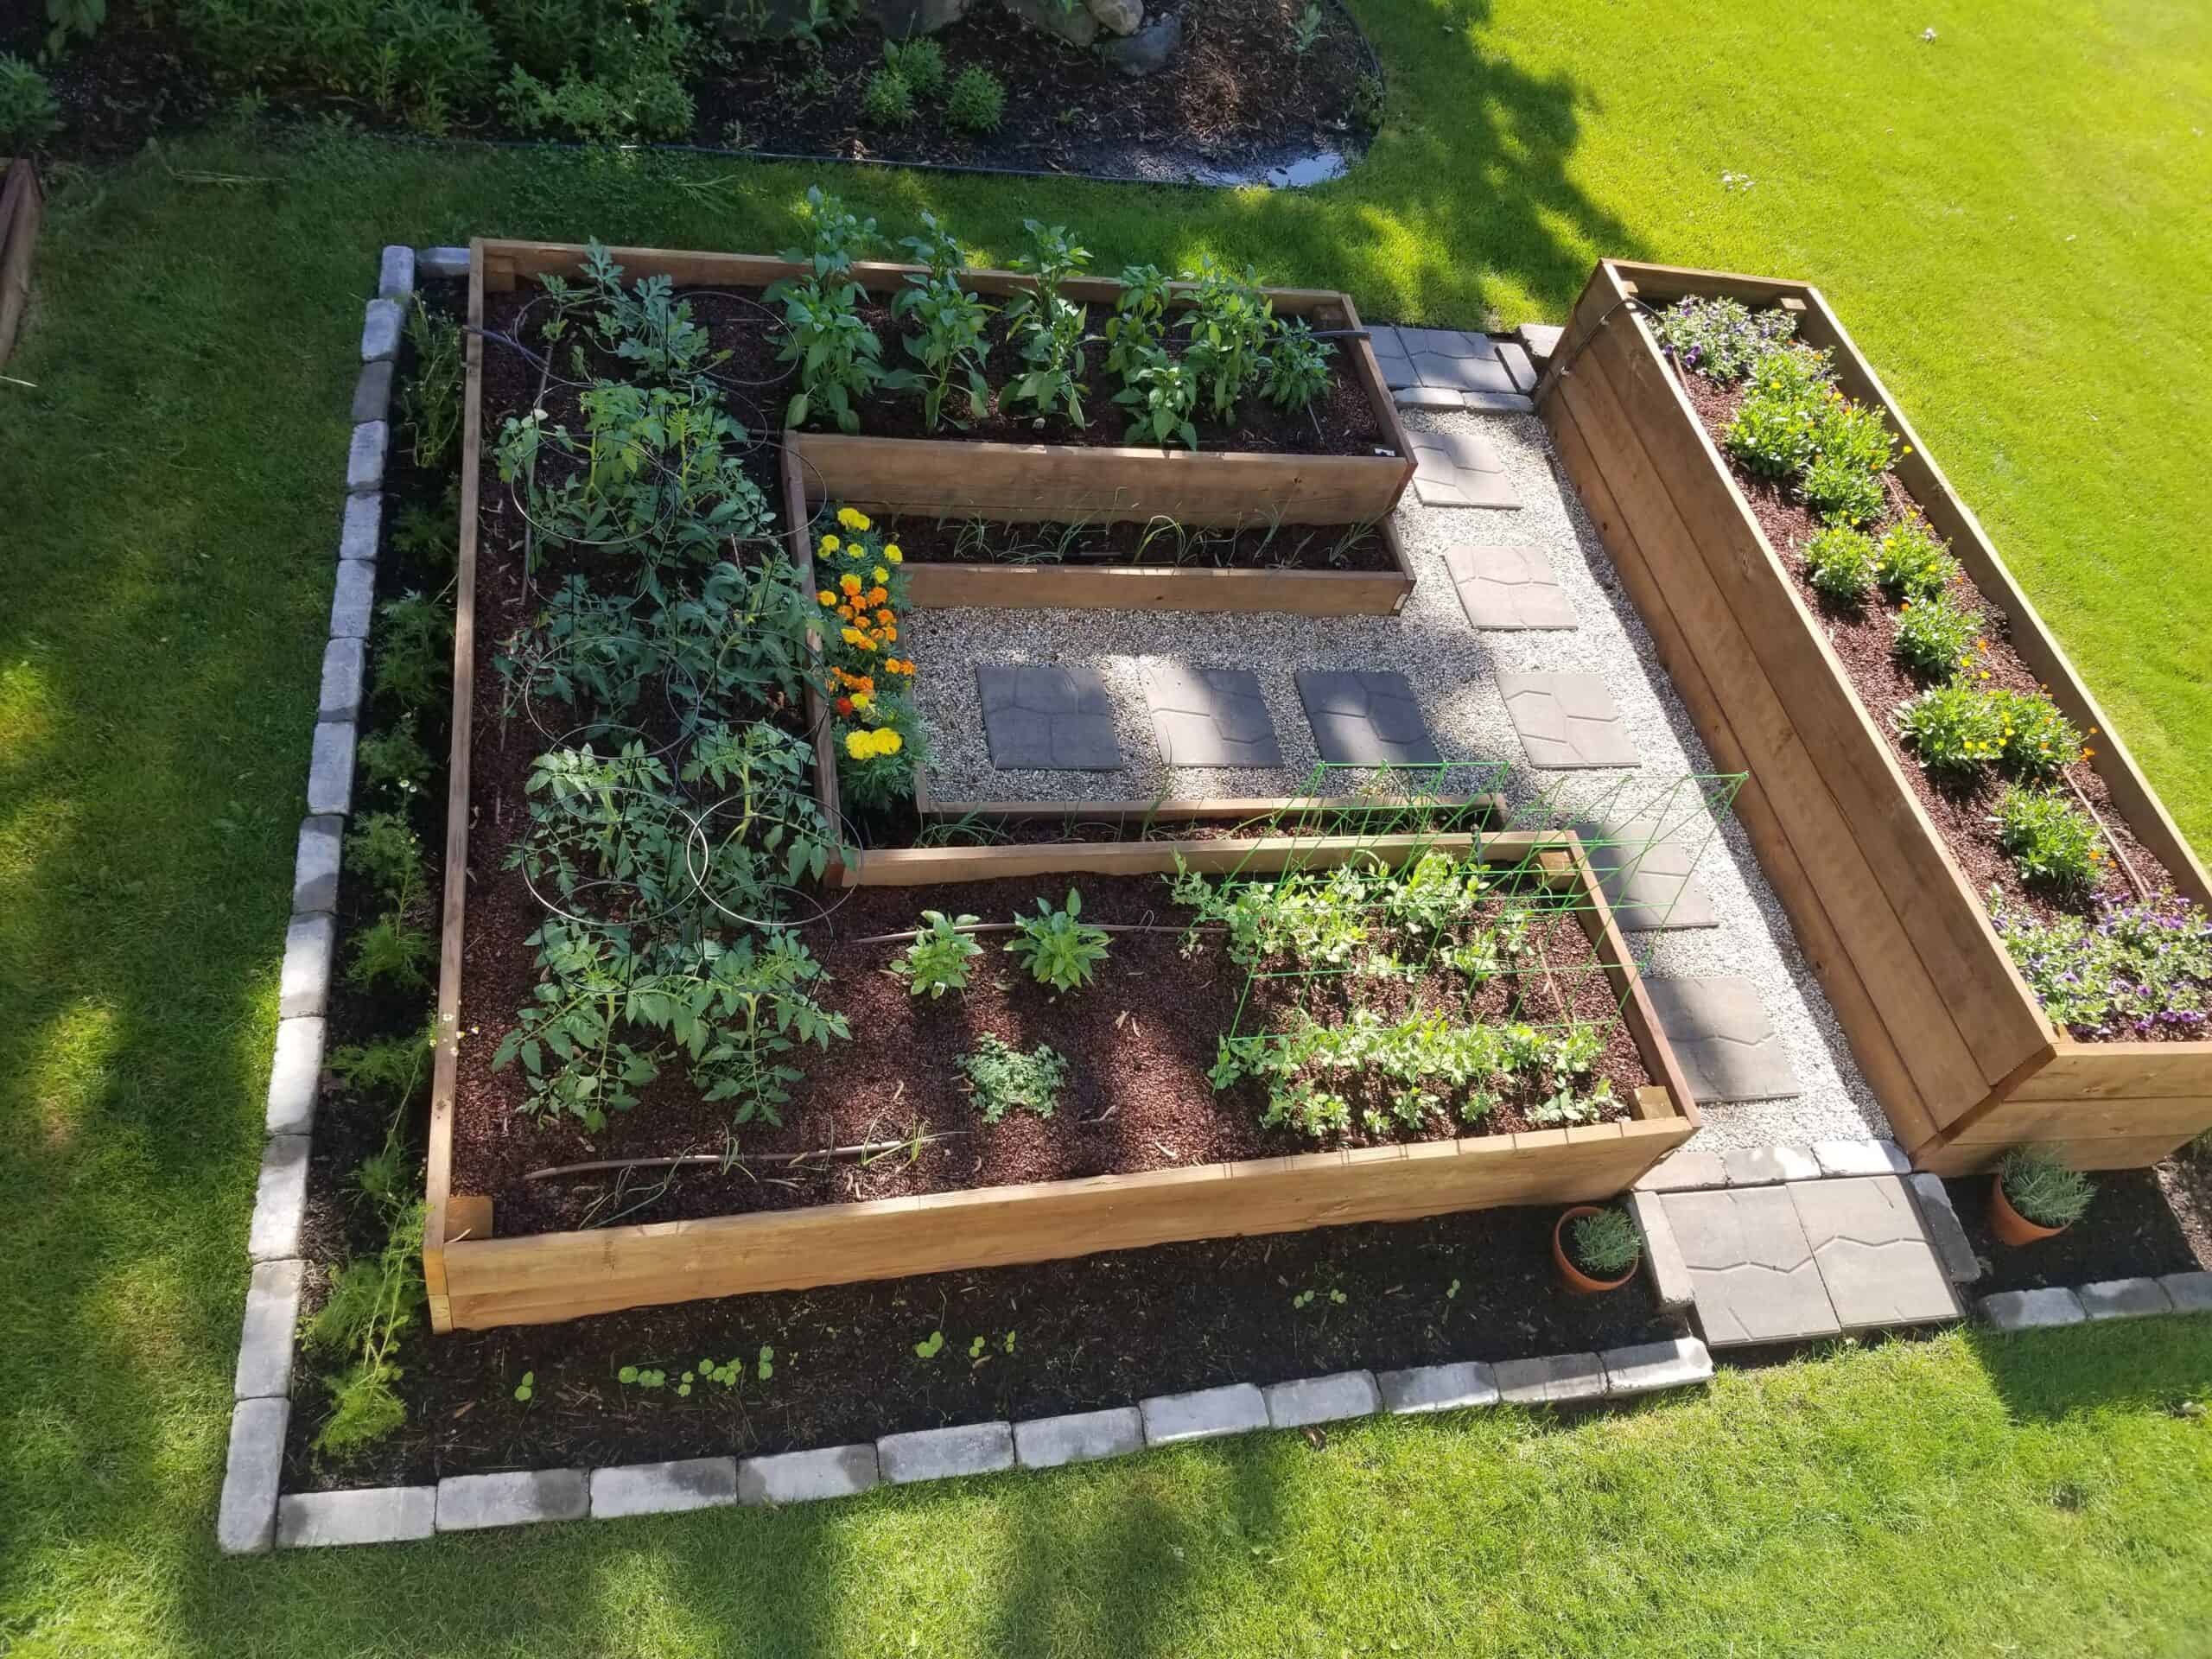
Raised garden beds are so effective because a lot of areas have native soil that isn’t ideal for gardening. In a raised bed you have a lot more control over your soil structure. As any gardener will tell you, great produce starts with great soil. Here is a simple no-dig method for building a raised bed garden. The best part? You can make it taller/short if you want, based on your preference or needs!

My original garden was smaller, was at ground level, and had 2 x 4’s for the borders of the garden. I started by running a string line to identify where the new garden would be.

I started by removing the top layer of sod for part of the area, but at the end of the day, I REALLY don’t think removing the sod was necessary. You can see the remnants of the spray painted outline I was attempting to follow. I laid down heavy duty landscaping cloth, and used landscaping staples to secure the cloth.

I purchased 2 x 10 cedar lumber (which is both food grade and ground contact safe). The landscape pavers are 16″ x 16″. All from my local home improvement store. The above layout helped my understand how much lumber I needed. I also know that the walkway needed to be AT LEAST 3 feet wide so I could drag a wheelbarrow, or other gardening equipment into the garden if necessary. ONE COMMON MISTAKE people make with raised beds is not leaving enough space between beds.

I built the first box using 3 rows of 2 x 10’s stacked on top of each other (approximately 28″ tall). I secured them using 4 x 4 posts in each corner, and 2 x 4’s in the center. These posts are about 4-6″ below the top rim so they could be covered once the box is filled.


Next I started building the U-shaped box. I also started filling the walkway with sand. The sand ended up being about 2″ deep. The corners of the U-shape also had 4 x 4 posts to secure the boards. The exterior of the U-shape is 2 rows high (approximately 20″). The inner potion is 1 row high (approximately 9″).
As you can see, I also started lining the edge of the bed with paver bricks. I thought it added a cleaner look, but if I could go back and do it again, I would use the landscaping bricks (the 16″ x 16″ pavers) along the back and sides of the bed.

Once the boxes were built, I started filling them. I used principles from the hügelkultur method, while also incorporating what I know about composting. Knowing the roots of my plants would likely not reach farther than 12″ deep, I knew I could add items in the bottom that would decompose slowly, adding nutrients to the soil over time.
In the end, I used some spare logs I had, a lot of bark mulch, and the sod I had cut from below the garden bed. On top of that I added straw and then soaked it well with the hose.
I also added the 16″ x 16″ paver blocks along the walkway, and filled in the spaces between paver with pea gravel.

I then add some leaves from the previous fall I had saved, and then a layer of coconut coir.

I added some top soil and compost.

Once the beds were almost full, I also added drip irrigation hoses throughout the beds.

I added a top layer of cocoa shells, and added some pepper plants. I also added some lavender terra cotta planters at the entry ways.

Above photo is about a month later, when the plants had a chance to grow on a bit. The whole bed got a top dressing of cocoa shell mulch. In the first year, I was able to grow lots of peppers and tomatoes, onions, sugar snap peas, spinach, basil, oregano, calendula, nasturtium, marigolds, lavender, watermelon, and chamomile.
Hope you enjoyed seeing the progress!
Happy DIY’ing!


