
This area was semi-finished and in desperate need of an update. It had hideous black and white tile, and an open entryway into my unfinished basement where there was storage, the furnace, and water heater. See my full project before and after page for more details.

I added 3 new cabinets in this area to allow for some additional storage space. I purchased unfinished cabinets from my local home improvement store. I had previously updated my main kitchen space with epoxy resin countertops, so I knew I could do the same in this small kitchenette.
I also laid the flooring and painted the refrigerator white. SUBSCRIBE below to always get notified when new project posts come out!
Prep:
After measuring the countertop, I glued 2 sheets of 3/4″ MDF together using wood glue. After the glue was fully dry I used my circular saw to cut out the shape of the countertops.
I used Bondo All-Purpose Putty to seal the seam between the 2 MDF boards, scraping the edge as smooth as possible. Once the Bondo was fully dry, I sanded it down to a smooth finish.
Using my handheld router, with a round-over bit, I rounded the top edges of the countertop.
Full Disclosure – I only use Stone Coat Countertop Epoxy, this stuff is awesome and very user friendly, not to mention the owner has a TON of Youtube videos showing you how to create all sorts of custom color combinations. Here is their channel: Stonecoatcountertops. I recommend completing a couple test pieces before taking on a new countertop.
FYI – I am NOT affiliated with Stone Coat Countertops. I just think their product is amazing, and they are huge supporters of DIY creations.
Base Paint Coat:


Because this countertop was going to include a sink, I wanted to make sure I used a waterproofing membrane on the underside and inside the sink mount area. This would ensure that I don’t get any water damage later on. I used Red Guard as my waterproofing membrane.
After applying Red Guard, I painted the entire surface using a light gray paint. After the grey base coat was fully dry, I was ready to start my first coat of texture.
The method I used to get the finish above is the “slate” method: https://youtu.be/iKheH1uySOU. This involves using water-downed paint, spray paint, and 91% isopropyl alcohol in a spray bottle. I would spray some of the spray paint, and then spritz with isopropyl alcohol. I continued to spray the piece until it had the texture I liked. The colors I used were Silver, Black, Cream, White, and Grey.
Applying this texture on the base paint coat will allow for more texture to show through on the final piece. I allowed this to dry overnight.
First Epoxy Coat:

Before starting, make sure that the space you are working in is at least 70 degrees Fahrenheit (or about 21 degrees Celsius). The epoxy will not function well in colder temps.
Tape all edges with masking tape to prevent the epoxy from flowing off the edges too fast. I mixed and applied the epoxy using the methods in the Stone Coat Countertop (SCC) videos. Since I had applied the textured base coat, I could leave this layer of epoxy semi-transparent, and add in more colored texture using spray paint and several different colors of epoxy to add “veins”.
As directed in the SCC videos, use a propane torch to remove any surface bubbles. Always wear safety gear: Respirator mask, latex gloves, and an apron to protect your clothing.

After about 1 hour, once the epoxy has begun to set, but is still fluid, remove the masking tape along the sides. Every couple of hours, use a wood stick (like a paint mixing stick) to scrape along the underside edge of the entire piece. This will get make sure that you don’t end up with solid drips on the underside of the piece. Allow to cure for at least 24 hours.
Final Epoxy Coat:
Once it’s completely dry, sand with 220-grit sandpaper. This allows the final coat to bond to the previous coat.


Pour the final clear coat. Allow to cure for at least 24 hours.
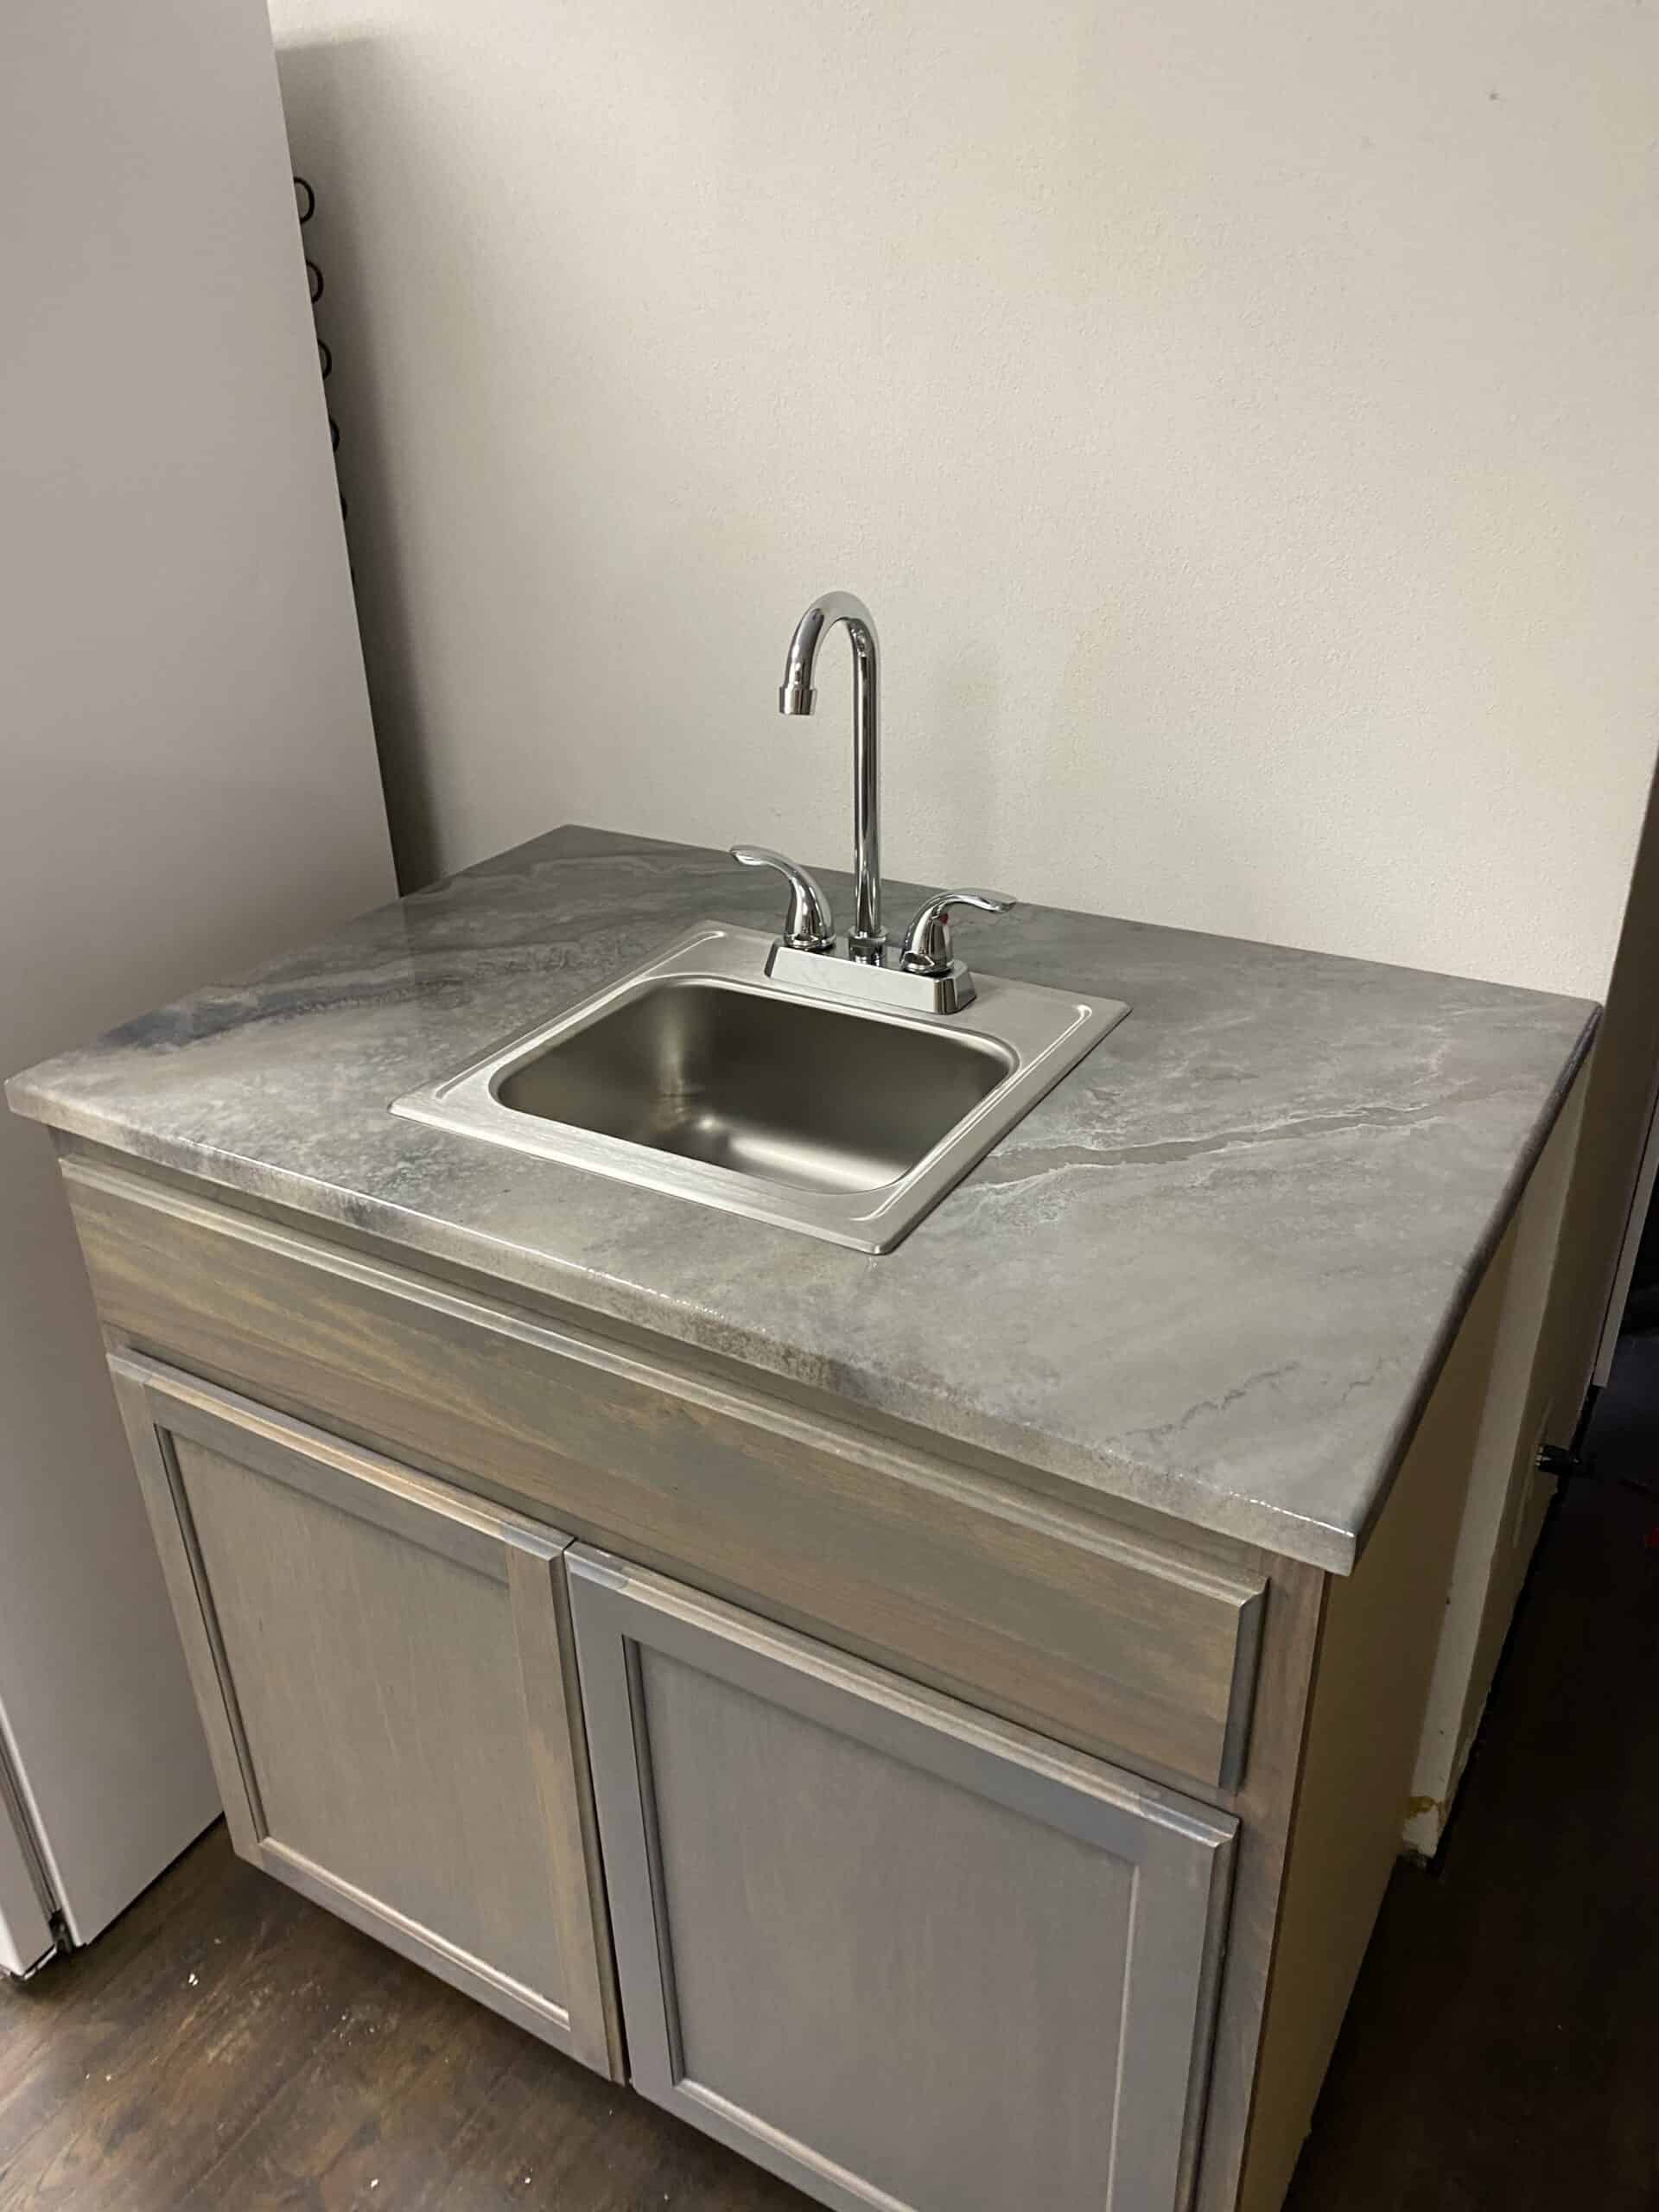
Install the countertops using construction adhesive.


I used Minwax Classic Grey for the cabinet finish.

Moment of Truth: The Plumbing Works!
Happy DIY’ing!
Disclosure: Twohandsdiy.com participates in the Amazon Services LLC Associates Program, an affiliate advertising program designed to provide a means for publishers to earn fees by linking to Amazon.com and affiliated sites.

Basement Kitchen - Two Hands DIY
[…] Resin/Epoxy countertops – more details coming soon! SUBSCRIBE to get notified when new content is available! […]
Jarrod Stiner
I appreciate the comments given to me. thank you