
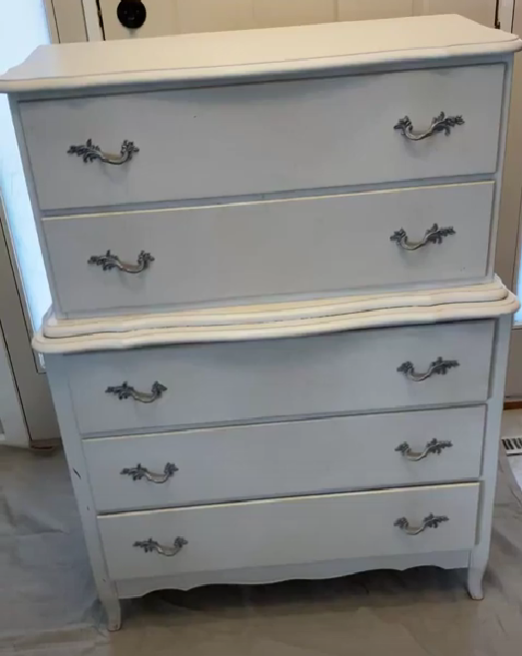
I purchased this dresser off Facebook Marketplace, and the previous owner used it for her daughters room. She told me she had painted it white years ago, and sealed it with a glittery topcoat. While this finish was perfect for a Princess-y girl’s dresser, I had something more grown-up in mind. This dresser makeover reminds of a dapper gentleman in his tuxedo! The full furniture flip video is below.

Products/Materials:
- Citristrip Paint and Varnish Stripping Gel
- LOTS of Sandpaper (60, 80 120, and 220 grit)
- Dresser Legs (4)
- Dresser Handles (10)
- Saran Wrap
- Odie’s Oil Finish
- Clean lint-free rags
- Paintbrushes/rollers
- Polycrylic Finish, Clear Matte
Tools:
- Impact Driver
- Scraper Tool
- Drawer Handle Jig
- Orbital Sander
- Circular Saw
- Drill
- Multitool (similar to this one)
Instructions:
- I start by removing all the hardware/drawer handles with my impact driver. I knew I wasn’t going to be using them for this project, but they might work for a future project, so I kept them.
- Normally, I would advise giving the entire dresser a thorough clean, but in this very special case, the top coat had so much glitter it was pretty thick, so I made the executive decision to skip this step. I wouldn’t recommend skipping it on 99% of furniture flips. So my first step was to use Citristrip Paint and Varnish Stripping Gel. This stuff was truly a gel, and was VERY STICKY. I applied it to the top and one-half of one side of the dresser, and also to a couple of the drawer faces. I knew I didn’t want it to dry out, so I covered the top portion with Saran Wrap…. the last few feet of my Saran wrap in fact.
- I regretted using Citristrip Paint and Varnish Stripping Gel almost immediately. This stuff doesn’t really dry (at least not in the few hours that I had to work on this project) and I needed to keep moving along on my flip. SO after scraping off the majority of the gunk, I cleaned the surfaces that had applied the stripping gel to with Mineral Spirits, and then wiped clean again with soap and water. And it STILL didn’t get 100% of the stripping gel. I don’t think I will ever use this stuff again. It could have been user error, but honestly, I would just prefer to sand if possible. The areas that used the gel didn’t get all of the paint off either, so I would have needed to sand either way.
- I have used a different paint stripper in the past that was MUCH more workable, so maybe on future flips where I want to strip paint, I will use that, but it is also not very environmentally friendly, so I try to avoid it.
- Once the surfaces were as dry, I used my Orbital Sander, and sanded with 60 or 80-grit sandpaper. This removed most of the glitter, the white paint, and some of the yellow paint (the original color of the dresser). For most of the surfaces, that is where I stopped, as 60/80 grit sandpaper leaves the surface pretty scuffed, and I wanted that for the paint I was going to apply. For the top of the dresser, as well as 2 drawer faces, I was going to be applying a finishing oil, so I sanded further. I use 120-grit, and then finished with 220-grit. This was A LOT of sanding…. but it was still better than that sticky mess of a gel.
- I also filled all the previous drawer handle holes with nail hole filler. I will be drilling new holes for the new hardware. I let this dry overnight, and then sanded lightly with 220-grit sandpaper for a smooth finish.
- I wanted to add new legs to the dresser, so I roughly measured where the legs would go, and cut the original bottom portion off the dresser using my Circular Saw. Then, using my multitool, I cut a section off each corner. These legs were shaped so they extended above the bottom of the dresser. If I had to do it all over again, I would return these legs, and get ones that sit flush underneath as this was somewhat difficult to line up the legs evenly. It came out ok in the end after MORE sanding to get the edges of each corner smooth and evenly spaced.
- I used a black paint that I had on hand as a primer. It’s not a specific name brand or anything special, it was just a bottom coat of paint that was dark enough mask the wood and any areas where I didn’t get 100% of the paint off. I let this dry overnight before proceeding.
- For the dark painted areas, I used some leftover SW paint in the color Urbane Bronze. I used this for my bedroom makeover, and I love the color. It has some grey and brown tones so it really matches a wide range of colors, but is still considered neutral. I rolled on 2 coats of the SW paint, and allowed it to dry completely overnight.
- While I was waiting for the paint to dry, I applied Odie’s Oil Finish using a clean lint-free rag to the top of the dresser, and the two top drawer faces. This is a bit more of an expensive finish, but only requires one coat, and you simply buff it on and then buff it off. I let this cure overnight as well.
- The next step was to apply the finish coat. I used 2 coats of Polycrylic Finish, Clear Matte, which were applied using a soft bristled brush. I was careful to use even strokes and avoid agitating the finish too much so I didn’t get bubbles in the final coat.
- Using my Drawer Handle Jig and my Drill, I drilled new holes for the drawer hardware. Each drawer got 2 new handles.
- I really thought these Dresser Handles look similar to cufflinks! This dresser went from Princess Gown to Dapper Gentleman!


- After all that it was simply re-assembling everything, and staging the final product to list for sale!
See full video with details below!
Let’s Talk $:
- Initial Investment: $60
- Materials: $130
- Knobs/drawer pulls, paint, finish coat, sandpaper, etc.
- Time invested: approximately 8 hours
- Listing Price: $300
- Profit if it sells for full list price: $110

Please SUBSCRIBE to be notified when new project posts come out!
Happy DIY’ing!