
I wanted to flip this dresser, and had a general idea of what I wanted to do. What I planned was to add some vertical dowels onto each drawer to add some modern details. Once I got it glued on, I didn’t like the way it looked, so I had to start over. I am so glad I did. I think it came out better than I had hoped.
See below for the full video.
Product/Materials:
- Sandpaper (120-grit and 220-grit)
- 1/4″ poplar dowels
- Wood Glue
- 1/4″ x 1 1/2″ Flat Stock Moulding
- Zinsser Primer
- Dresser Legs
- Dresser Leg Bracket Kit
- Furniture Leg Felt Pads
- Jolie Paint – Swedish Grey
- Howard’s Feed-N-Wax
- Jolie Finishing Wax Topcoat – Clear
- Brass Drawer Knobs
- Brass Drawer Handles
Tools:
- Orbital Sander
- Dewalt Clamps
- Carbide Scraper
- Brad Nail Gun
- Air Compressor
- Dewalt Drill
- Cabinet Hardware Jig
Instructions:
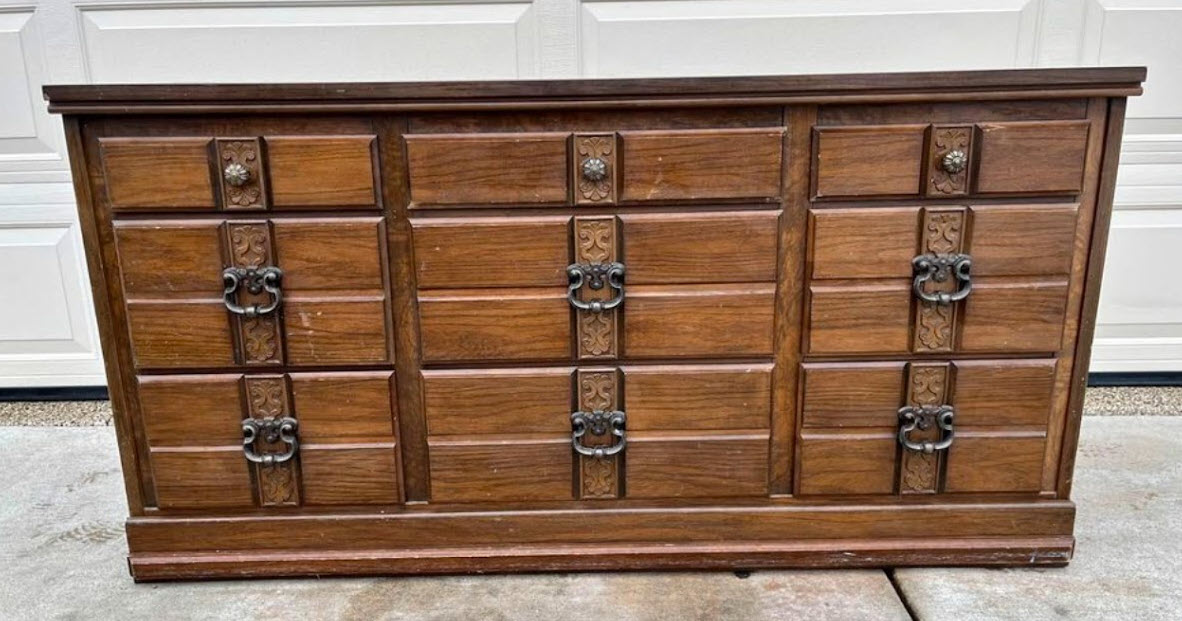
- Remove all the hardware pieces. I decided to get rid of these drawer pulls since they are so outdated. I have added them to my “donate to Habitat for Humanity Re-Store” pile.
- I cleaned the entire dresser, and drawers, using warm water, dish soap, and lemon essential oil. The dish soap acts as a degreaser, and the lemon oil neutralizes any smells and acts as a natural cleaning agent.
- I also removed the plastic decorative trims from the center of each drawer. While these weren’t terrible, I had something different in mind.
- I sanded the entire piece using 120-grit sandpaper. I knew I was going to be painting the piece, so I just wanted to create a scuffed surface to allow the paint to bond better.
- Next, I added some 1/4″ poplar dowels to the drawer fronts in a centered and vertical pattern. I was going to use this pattern, with a flat handle at the top of the drawers. After everything was glued on 3 of the drawers, I decided I really didn’t like the way it looked. On to Plan B.
- I removed the glued on dowels using a crow bar, a carbide scraper, and some heavy grit sandpaper, and started over.
- I decided to do a custom pattern on the drawer fronts using some 1/4″ x 1 1/2″ flat molding. I also decided to use different hardware that complimented the design. Honestly, I’m not sure how I came up with the design, I just kind of sat and stared at the dresser until something popped into my head.
- I measured, (and re-measured) the flat molding pieces to make sure they were all cut the same, and I also measured carefully to ensure they were centered both vertically and horizontally on the drawer fronts. I knew that once they were installed, if they didn’t line up, it would ruin the design, so I took my time on this part.
- After everything was measured, cut and I made sure it lined up by dry-fitting all the pieces, I glued and nailed the new molding to each drawer front.
- Using Zinsser Primer, I primed the entire dresser, and the drawer fronts. After the primer dried, I sanded the brush strokes smooth using 220-grit sandpaper.
- For this piece, I wanted to brighten the finish, so I decided to use Jolie Matte Finish Paint in the color Swedish Grey. I’m not affiliated with Jolie Paint, but I am quickly falling in love with this brand of paint. It is definitely on the expensive side, but I love the coverage and the colors for furniture pieces.
- I also wanted to add some decorative legs to this piece. I ordered these from Amazon, and when they arrived, they were just the legs (no pieces to attach them), so I had to order mounting brackets also. Once I had the legs, and the hardware, I painted the legs using the same Jolie paint, and mounted the legs using the mounting hardware.
- Once the paint was completely dry, I applied a generous coat of Jolie Finishing Wax TopCoat in Clear. I like this because once it’s cured, it provides a really smooth buttery finish, it’s water resistant, and it doesn’t change the color of the piece like a lot of other finishes will.
- To condition the drawers, I applied some Howard Feed-N-Wax to provide some much needed moisture to the wood grain. Once cured there is no residue and no harsh smell like some other waxes I’ve used (looking at you Johnson Paste Wax…). In fact, Howard Feed-N-Wax smells great while you are applying it, but has no smell once it’s cured.
- The final step was to attach the legs to the bottom and attach the hardware.
- To attach the legs, I had to reinforce the bottom of the dresser using some 2 x 4’s I cut to fit. Once the bottom was reinforced, I simply attached the mounting bracket and added the legs.
- For the hardware, I used my cabinet hardware jig to line everything up and drill holes to attach each drawer knob and drawer pull.

Let’s Talk $
- Initial Investment: $130
- Materials: $110
- Paint, finish coat, sandpaper, lumber, etc.
- Time invested: approximately 8 hours
- Listing Price: $500
- Profit if it sells for full list price: $260
Please SUBSCRIBE to be notified when new project posts come out!
Happy DIY’ing!