
As part of my master bedroom makeover, I wanted to add some shelving to this corner. When I started thinking about what kind of shelving I wanted, I knew I wanted them to be unique and I also wanted them to be floating shelves. After a bunch of research, this is what I came up with, and I have to say, I’ve REALLY happy with how it turned out. This boring corner has definitely come alive with these unique shelves!
I purchased three 7 foot lengths of the wood species gummy cherry from my local woodshop. This species is a bit more expensive, so if you don’t have the budget, any standard wood type would work, even pine. I just couldn’t resist the beautiful markings in the wood. They are approximately 7.5″ wide. Because I purchased these as raw wood, I had to cut the widths of each board to match. After I cut each one, I sanded all sides of the boards with 120-grit, then 150-grit, and finally 220-grit sandpaper.
After sanding, I buffed on Odie’s Oil in Natural finish. Again, this finish is a bit more expensive, so if you are working on a lower budget, you could use any type of sealer you prefer. I’ve used Tung Oil in the past, or simple coat of Polyurethane would also suffice. With Odie’s oil, simply apply with a clean rag, and then working it into the wood, buff any excess residue off, and it’s done!

I found these floating shelf brackets at my local woodshop (a similar product available on Amazon here). I bought several pairs as I wanted to be able to have a set for each horizontal shelf.

I found and marked the studs in my wall using a magnet. This is the best way to find wall studs in my opinion! After marking the studs, I used my laser level as a guide to install the shelf hardware.

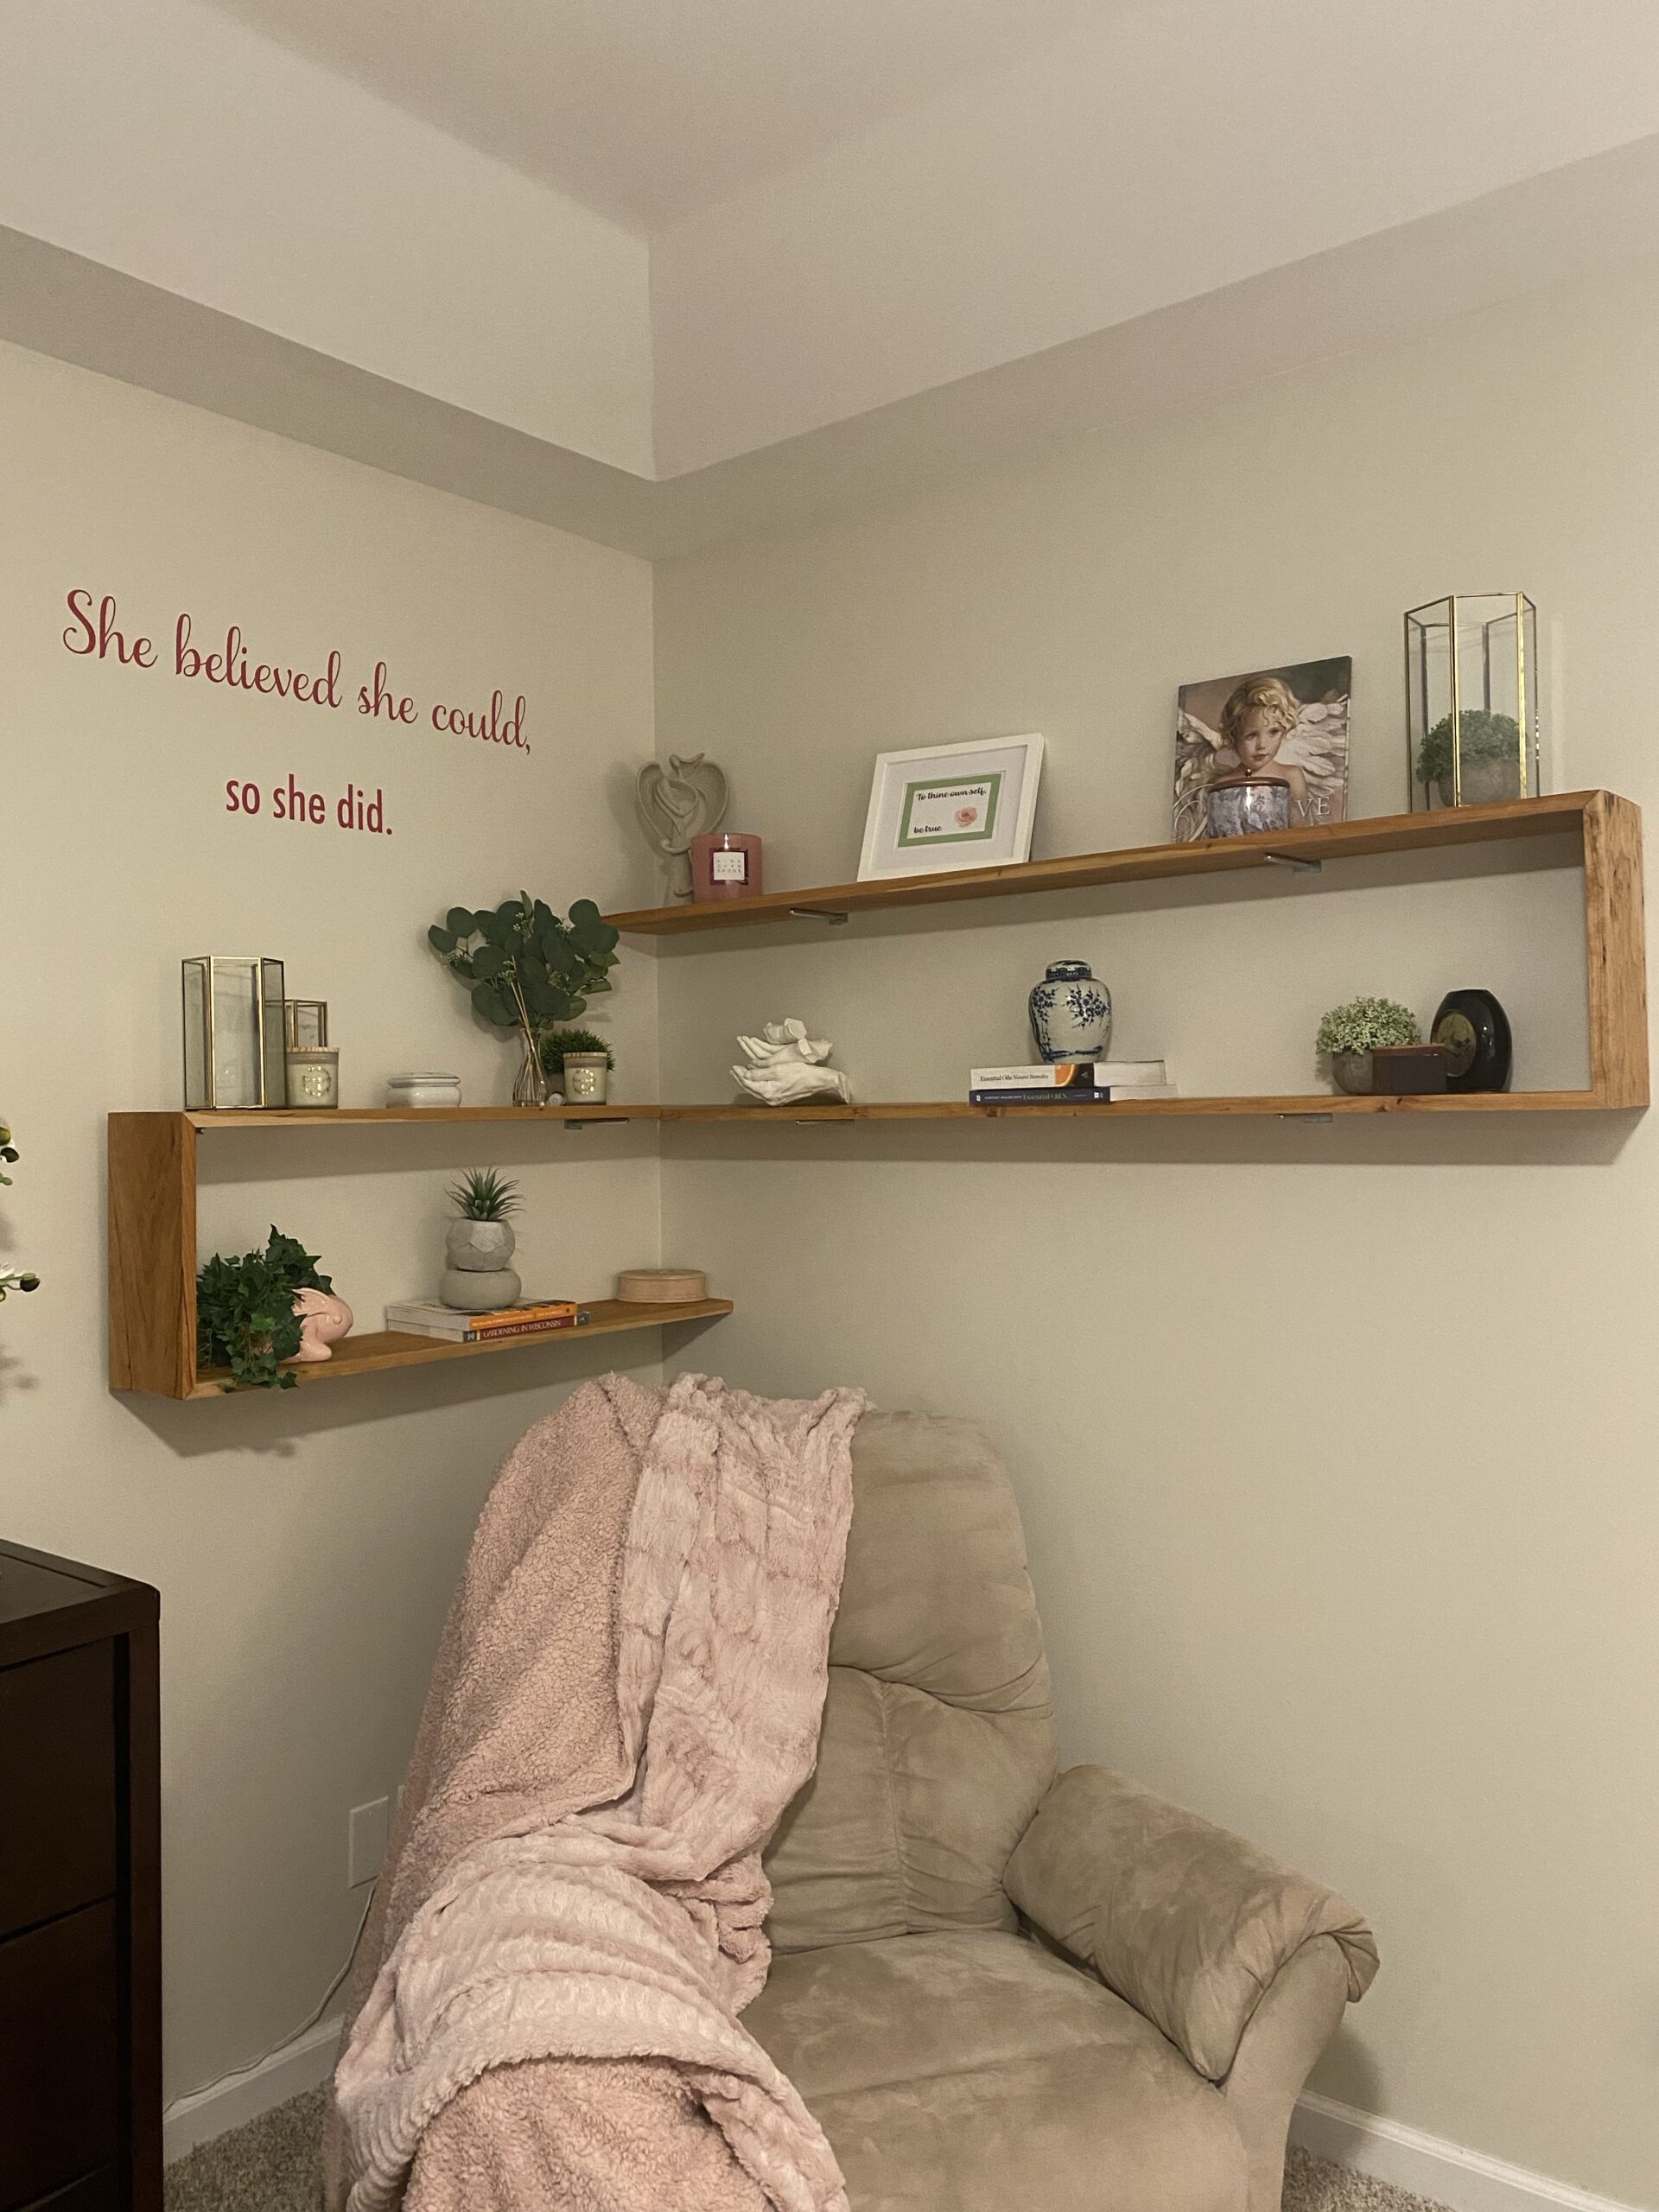
I started by adding the horizontal boards first. I cut the edges of the boards at a 45 degree angle using my miter saw (similar to this one). Unfortunately the wood I bought wasn’t thick enough to insert the shelf hardware into. Such is the DIY life I suppose! So I ended up just setting the shelf on top of the hardware. I might go back and route a groove in the bottom so the pegs can sit just inside the board, but we’ll see…. My cat isn’t convinced…

There is approximately 12″ of space between the shelves. Once the horizontal shelves were in, I measured and cut the two end pieces, making sure that they would were vertically level. I secured these using my nail gun. I ordered a custom wall decal, which I applied to the wall, added some personal decorations, and voila!
One thing I’m loving about this shelf that you can’t “see” with the picture is the essential oils I bought…. In the glass vial in the middle corner, I added some essential oil reed sticks, some faux eucalyptus, and this Deep Calm essential oil, and it is so lovely! It really helps the newly decorated space feel extra cozy! If you like any other specific items, please comment below and I can point you to where I found them!
Please SUBSCRIBE below to be notified when new project posts come out!
Happy DIY’ing!
Disclosure: Twohandsdiy.com participates in the Amazon Services LLC Associates Program, an affiliate advertising program designed to provide a means for publishers to earn fees by linking to Amazon.com and affiliated sites.

How to hand floating mirrors - Two Hands DIY
[…] with a gap between the mirror and the wall. While I was at my local woodshop getting lumber for the shelving I put up in this room, I found some hardware for hanging artwork using the french cleat method. I used Super Glue to glue […]
Master Bedroom Before and After: Extra cozy and bright! - Two Hands DIY
[…] Unique custom built shelves […]