
Do it the EASY way: no fractions, no sanding, SIMPLE!
I think the hardest part about this type of DIY wall panelling is figuring out the spacing of all the panels. Let’s face it, math isn’t always easy. When I decided to put up wainscoting in my home office, the most challenging part of was figuring out the correct spacing between the boards so the pattern was simple and pleasing.
I went back and forth between using 1 x 3’s, 1 x 4’s, and 1 x 2’s….BUT I didn’t want to worry about an extra 1/8” or 1/4” here and there… and I also had to work around several outlets, it was frustrating. Can you relate?
If you can, then do what I did, and ditch the traditional lumber boards! Work SMARTER, not HARDER. This board and batten wall is uses MDF sheets cut into strips. Building this way allows the wall to be completely custom, cheap, and easy.
Materials:
- 3/4″ thick 4 x 8 MDF Sheet
- 1 x 4 Pine lumber
- 4 x 8 foot Smooth melamine white or brown panel (doesn’t matter which, as long as the surface is smooth)
- Caulk
- Paint (color of your choice)
- Liquid Nails
- Wood Putty or Drywall spackling
Plan:
First, I figured out how thick I wanted the boards to be based on my preferred design (not the lumber’s nominal width) – SO MUCH EASIER! (Did I mention easy?) See my measurements below, but remember, if you want to adjust to your preference, it’s easy to do that!

Using this design, cut your MDF sheet into appropriate size boards for Part A, B, C, and D (shown in Figure 1)
Prep:
Remove any outlet covers. That’s it! Easiest. Prep. EVER!
Build:
Apply Liquid Nails to the back of the white board sheet, and glue to the wall. Add a couple brad nails to secure it in place.
Make sure you use shorter brad nails, ½” to 1”. Your intention is to simply keep the board from falling down while the liquid nails dries, it’s not to secure it to the wall. Longer nails could puncture pipes or other items buried in the wall. SAFETY FIRST!
(Another option here if you wanted to skip the melamine board is to sand the drywall to a smooth finish. I opted for the melamine board so I could avoid so much sanding).

Using the base board you cut from your MDF sheet (item B in Figure 1), apply Liquid Nails to the back and secure it at the base with a few nails. Ensure you apply some downward pressure if you are installing over carpet. Also, use a level to make sure you are securing it straight.
Next, secure the vertical boards (part A in Figure 1). To simplify attach each board, take one piece of your middle horizontal board (part D in Figure 1) and use this to ensure proper spacing for each Part A. Use a level to make sure Part A boards are straight up and down vertically.

Next add your top MDF board (Part C in Figure 1). This should be simply applying some Liquid Nails to the back and resting it on top of all the vertical Part A boards. Just to be safe, check with a level before nailing in place.
Use a scrap piece of wood cut to the length to match the spacing between the bottom board (Part B) and the middle board (Part D). Use this when gluing/nailing Part D in place to ensure each board is the same level. Speaking of level, use one when gluing/nailing Part D in place.
On top of Part C, glue/nail a shelf using 1 x 4 Pine board.
That’s it! Super simple right!
Finishing:

Fill all the nail holes and seams with wood putty or drywall spackling. (Example, the seams between Part A and Part D) Let dry, and lightly sand.
Apply caulking to each of the inner seams where the MDF boards sit on to of the white board, as well as the inside corner where the 1 x 4 pine sits on top of Part C.
Paint!

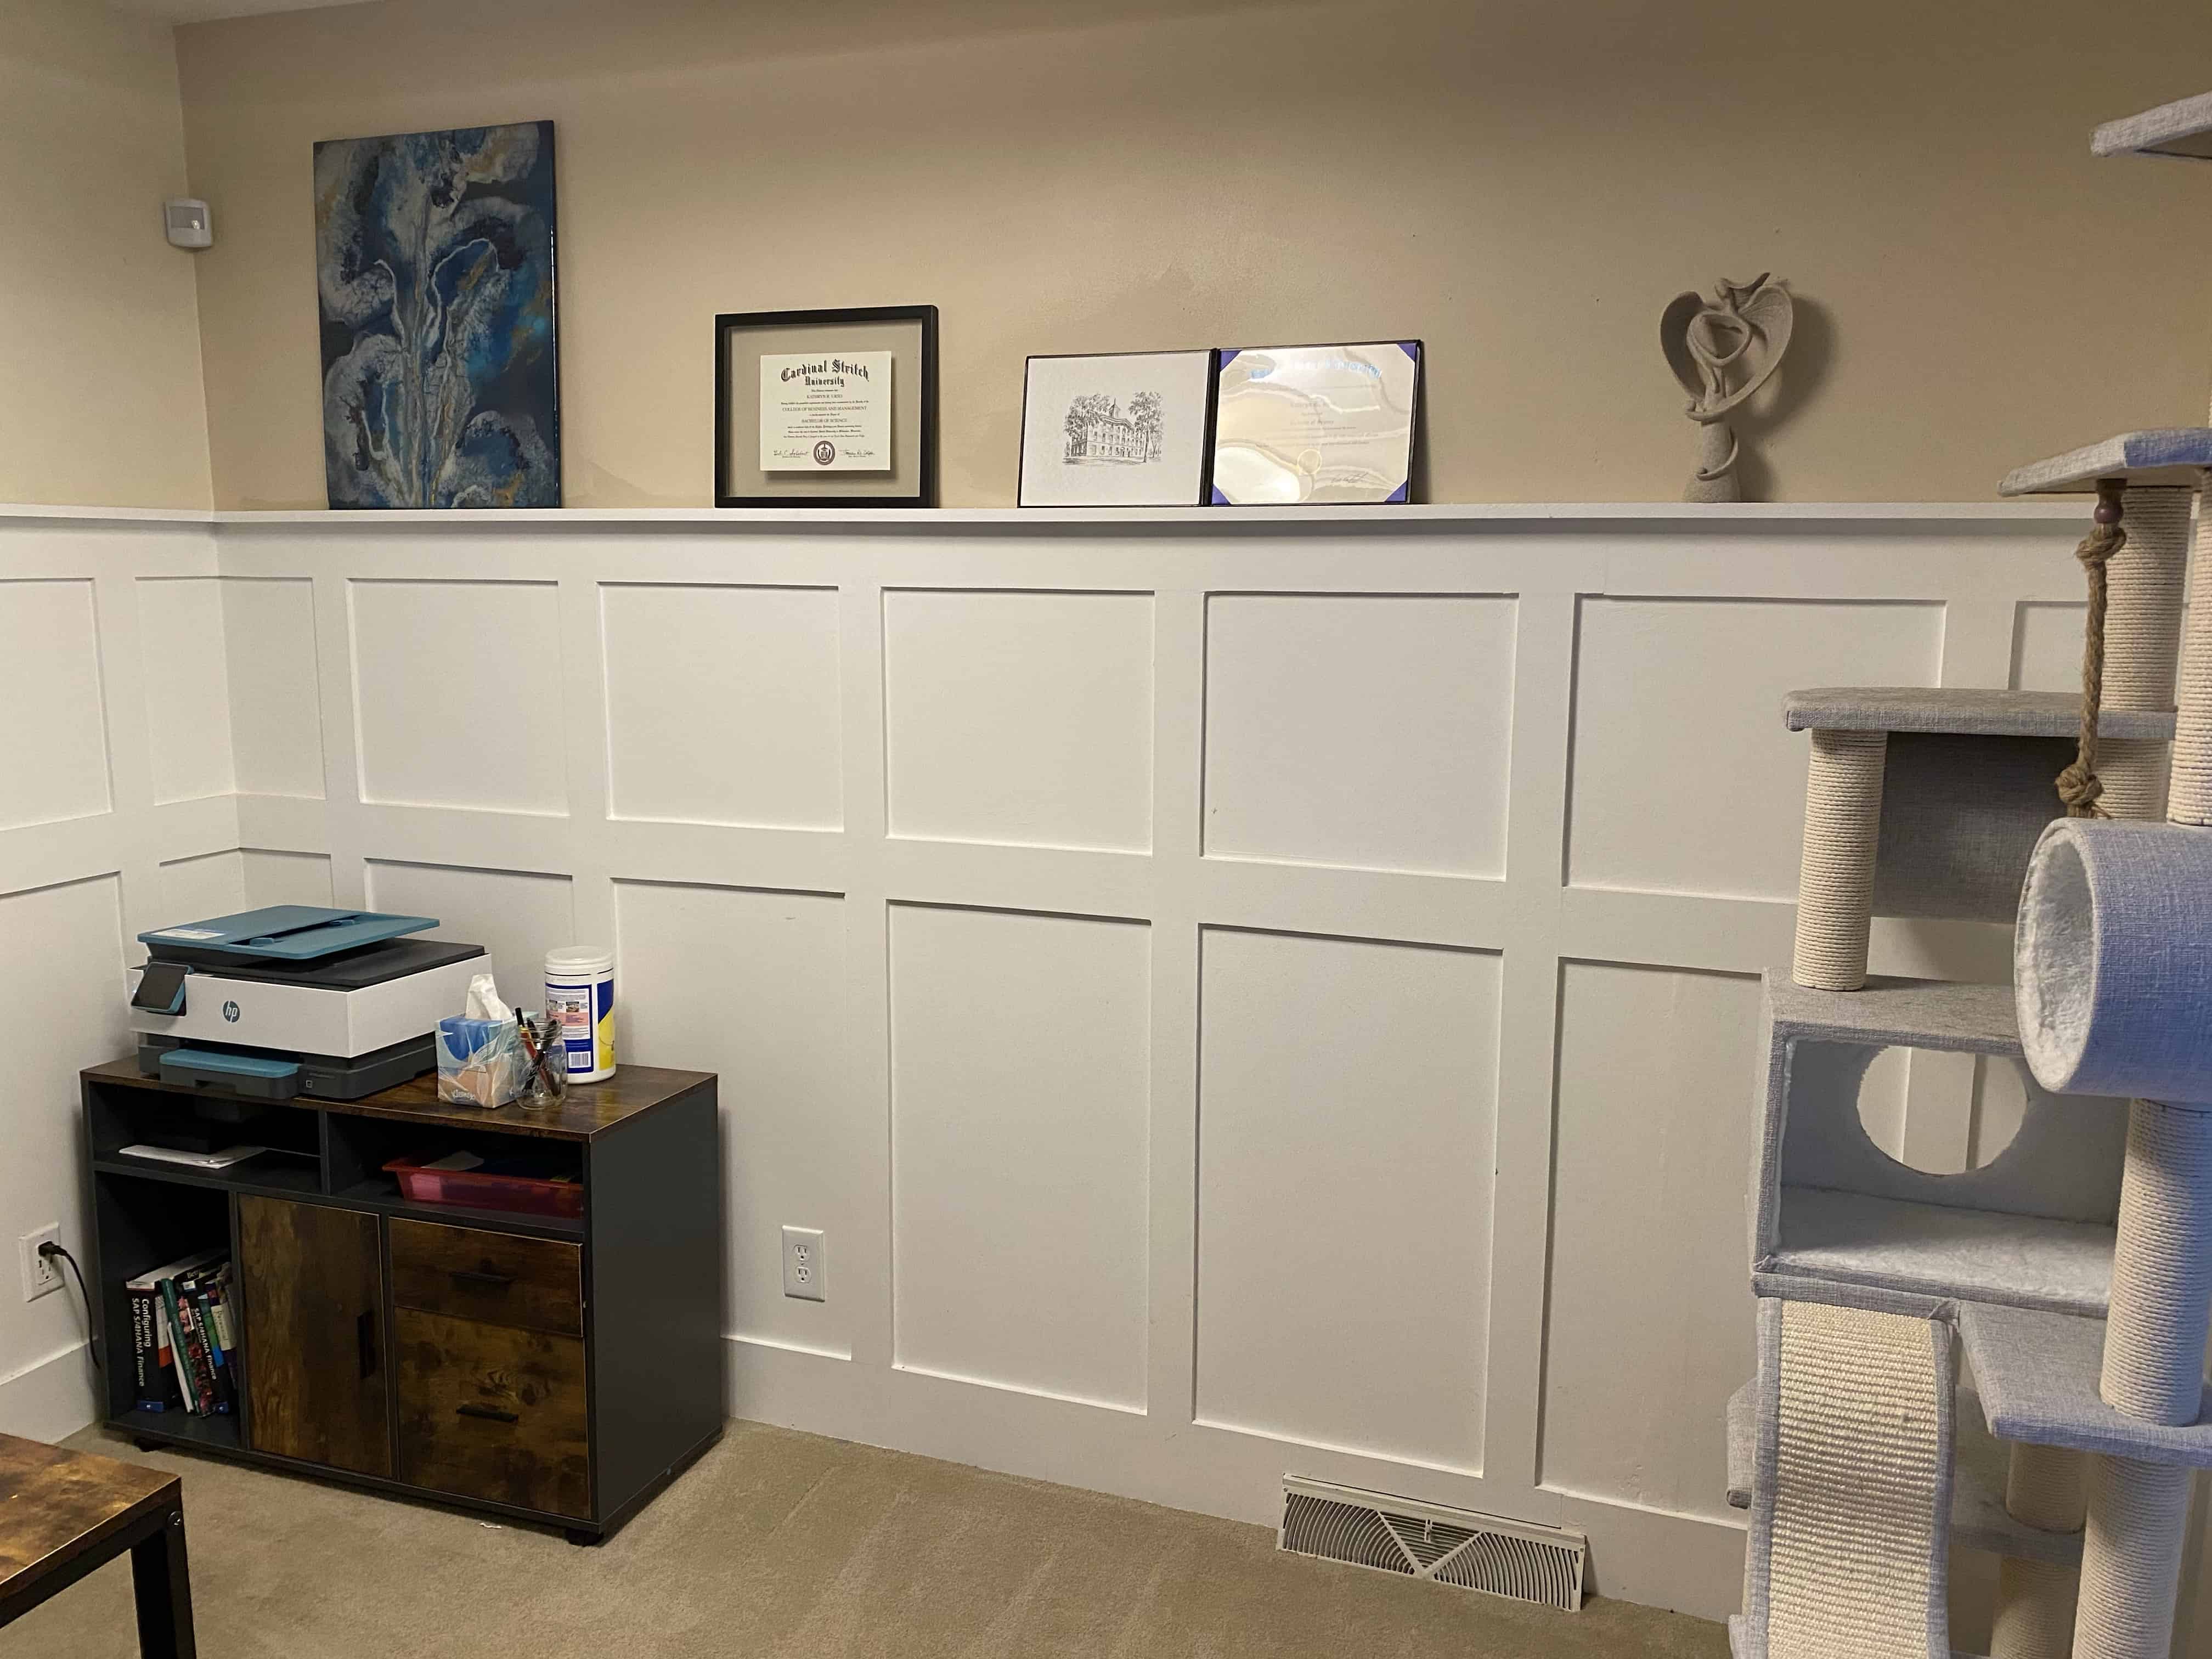
I used a paint sprayer for a even coat and went with white for a simple clean look. You can paint this literally any color you want! Once everything is painted, replace the outlet covers and decorate with your favorite knick-knacks!
Please SUBSCRIBE to get notifications of new posts!
Happy DIY’ing!

Lindsey
I love this. This adds character to your home and is explained in a way that you could truly do it yourself. Thank you for sharing! Look forward to more!
Do you really need to caulk trim? Why and how? - Two Hands DIY
[…] it’s painting window frames, wainscotting panels, baseboard trim, or any other type of update involving trim, a cleaner look is achieved if you […]