
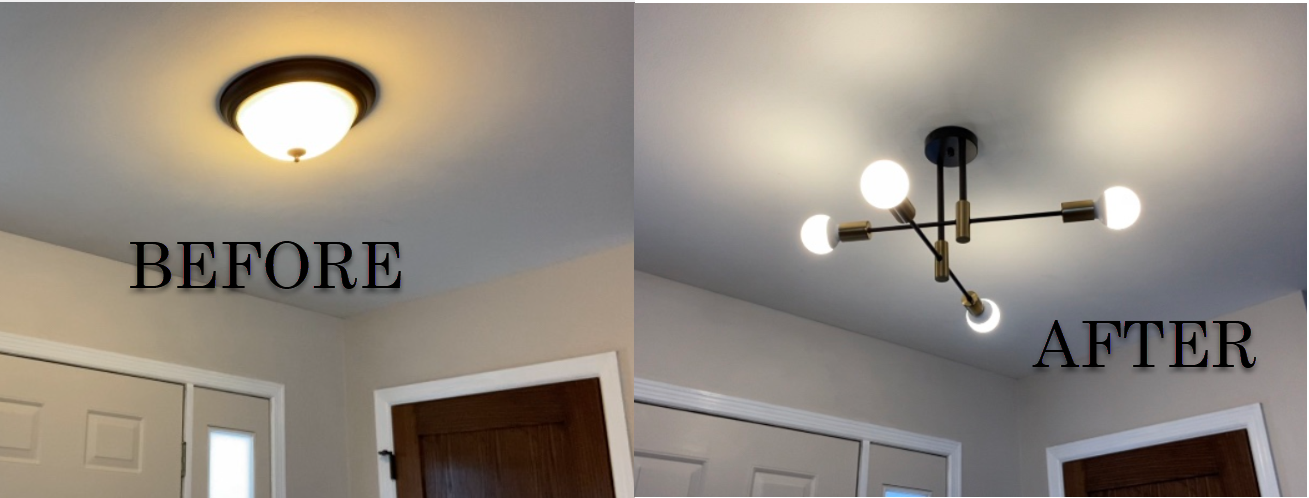
What the heck is a “boob light”? It’s the builder grade dome lights that are likely somewhere in your home…. In my home, they are in each of my kids’ rooms, in my hallway, and at the front entryway to my home. Something must be done…. So today, we are starting with the front entryway, and replacing it with a more modern black and gold sputnik chandelier.

Here is the boob light that I had in my front entryway. If you are older than a kindergartner, I’m imagining you can figure out how it gets its name….
Moving on…
I unboxed and partially assembled the new light fixture.

FIRST: TURN OFF THE POWER!!
The best way to do this is to flip the breaker to the “OFF” position.
To turn off the power, locate your circuit breaker (usually in the basement by your furnace or water heater). There will be a lot of black switches, and usually each switch is numbered and there will be some kind of guide to know which switch goes to which section of the house. Mine looks like this. Notice all the switches are turned to “ON”.

Each circuit breaker is numbered, and there is a guide telling me which circuit breaker powers each area of my house so if I want to turn off the power to my Dishwasher for example, I can turn off the power source to it, without turning off the power to the whole house. If your home is older and doesn’t have this kind of system, you may want to reach out to a professional. I am NOT A PROFESSIONAL ELECTRICIAN, and therefore you complete this type of DIY at your own risk.
To turn off the power with this type of system, simply flip the appropriate circuit breaker to the “OFF” position (see example below).

To be extra safe, you can always use a voltage tester pen to ensure there is no electricity flowing through the area you are working on.
Remove the old light fixture
Once the power is off, you can remove the old light.
Start by removing the outer glass. Unscrew the bottom piece and the glass will just fall off. At the top of the light ballast, there are 2 screws that are securing the ballast to the mounting plate. Loosen these 2 screws. It’s ok to remove them, but not necessary. There will be a long center bolt. You will likely need to loosen and/or remove this center bolt completely. Once the center bolt is removed, you should be able to turn the whole piece counterclockwise and the fixture will fall away from the ceiling, however it is still attached with the wires.
Depending on how the wires are attached, you could simply unscrew them, or you may need to cut the wires. If you do need to cut the wires, try to leave as much of the wire as possible that is coming from the ceiling. You do however, want to completely remove any wire coming from the light fixture.
Install new light fixture
For this particular sputnik chandelier, I started by attaching the hanging plate. I ran the neutral (white) and hot (pink) wire through the center hole. The Hot wire is pink because there is more than one light switch controlling the power to the light. A single-pole light will have a black hot wire, a 3-pole light switch will have a pink hot wire. The copper wire is the ground wire. Since I had to cut the wires to remove the old light fixture, I also stripped about a 1/2″ off the end of the neutral/hot wire casing to expose the inner copper wire.

Again, I’m not a professional electrician, so right or wrong, I always attach my wires the same way.
I start with the ground wire, then the neutral wire, and last the hot wire.
This particular light switch had four neutral and four hot wires, a set for each light bulb. Once the ground wire was secure, I twisted the 4 neutral wires together, and then secured them to the neutral wire in the ceiling, using a wire nut. I repeated this for the hot wire, twisting the 4 hot wires from the fixture together, and then twisting them securely with the hot wire in the ceiling, ensuring the wire nut was secure.
Once all the wires were secure, I fastened the 2 hanging plate screws on either side of the hanging plate.
All that was left to do at this point was install the four light bulbs. I bought these bulbs specifically for this light fixture.

And then the final moment of truth, turn the power back on and TA DA!!! A brand new light fixture installed in less than an hour!
Please SUBSCRIBE below to be notified when new project posts come out!
Happy DIY’ing!
Disclosure: Twohandsdiy.com participates in the Amazon Services LLC Associates Program, an affiliate advertising program designed to provide a means for publishers to earn fees by linking to Amazon.com and affiliated sites.
