
Like most boys his age, my son is VERY into Pokemon. When I decided to makeover his room, I wanted something fun, something that represented him and his interests. He was also about to start 2nd grade and he chose a Pokemon backpack, so I thought, why not? I also wanted to add some art pieces, and shelving where he could keep his cards and figurines.
Materials:
- Paint – 1 quart each:
- Red: Dutchboy Double Decker
- Black: Dutchboy True Black
- White: Dutchboy Silvered Fog
- Painters Tape
- Paint Brush/roller
- Shelf Hardware
- Battery Operated Tap Light
- Shelf Lumber
- Thumb tack and short string/yarn
Steps:
- If the room is currently darker in color, it would be best to use a primer to paint the entire wall first. This wall used to be baby blue, so I used a primer that I had on hand, as a base coat.
- Using a level, apply painters tape across the entire width of the wall approximately 48″ from the floor. Approximately 6″ above this, add another line across the entire width of the room (use a level to ensure it is straight)
- FIRST – along the tape line, paint with the color that will match up with the line. For example, the top line of tape meets up with the Red paint, so I FIRST paint with red. Wait for that paint to dry. THEN over top and filling in the rest of the middle line, paint with the Black paint. When the final coat of Black is STILL WET, remove the tape. Allow this to fully dry. This will allow the tape line to be crisp and clean once the tape is removed. See this post for an example/inspiration for this tip: https://honeybuilthome.com/how-to-paint-a-crisp-line/
- While waiting for this to dry, you can prep the circle for painting. In the center of the black stripe, and the center of the room, push a pin or nail into the wall. Attach a string approximately 16-17″ long. At the end of the string, attach a pencil or marker. Holding the string taught, draw a circle on the wall (this is the outer edge of the circle.)
- Next, shorten the string by 6″. Again, hold the string taught and draw a circle on the wall. This is the inner circle.
- Using a 1″ paint brush, paint the Black circle. If you go outside the lines anywhere, it’s ok! You will be able to fix any misses when painting the rest of the wall. Allow the black circle to dry completely.
- Using the White paint, paint the inner circle.

- Apply tape on the top and bottom edge of the black line. Paint with Black along the edge. Allow this coat to dry, then paint with either White or Red (Red on the top, White on the bottom). Apply s many coats as needed for coverage. When the final coat is STILL WET, remove the tape.

- Carefully paint the inner circle. Add any touch ups with black as needed.

- I cut a 1 x 6 pine board that I had on hand into 2 pieces approximately 33″ long. No reason for this length other than it fit the space well. I used the same Black paint, and applied 2-3 coats so it would blend in with the stripe.
- I was able to find the studs in the wall so I would know how far apart to attach the shelf hardware. Standard width between studs is 16″, but it’s good to double check. I attached the shelf hardware to the boards, and then lining them up with the studs, I secured the shelves to the wall.
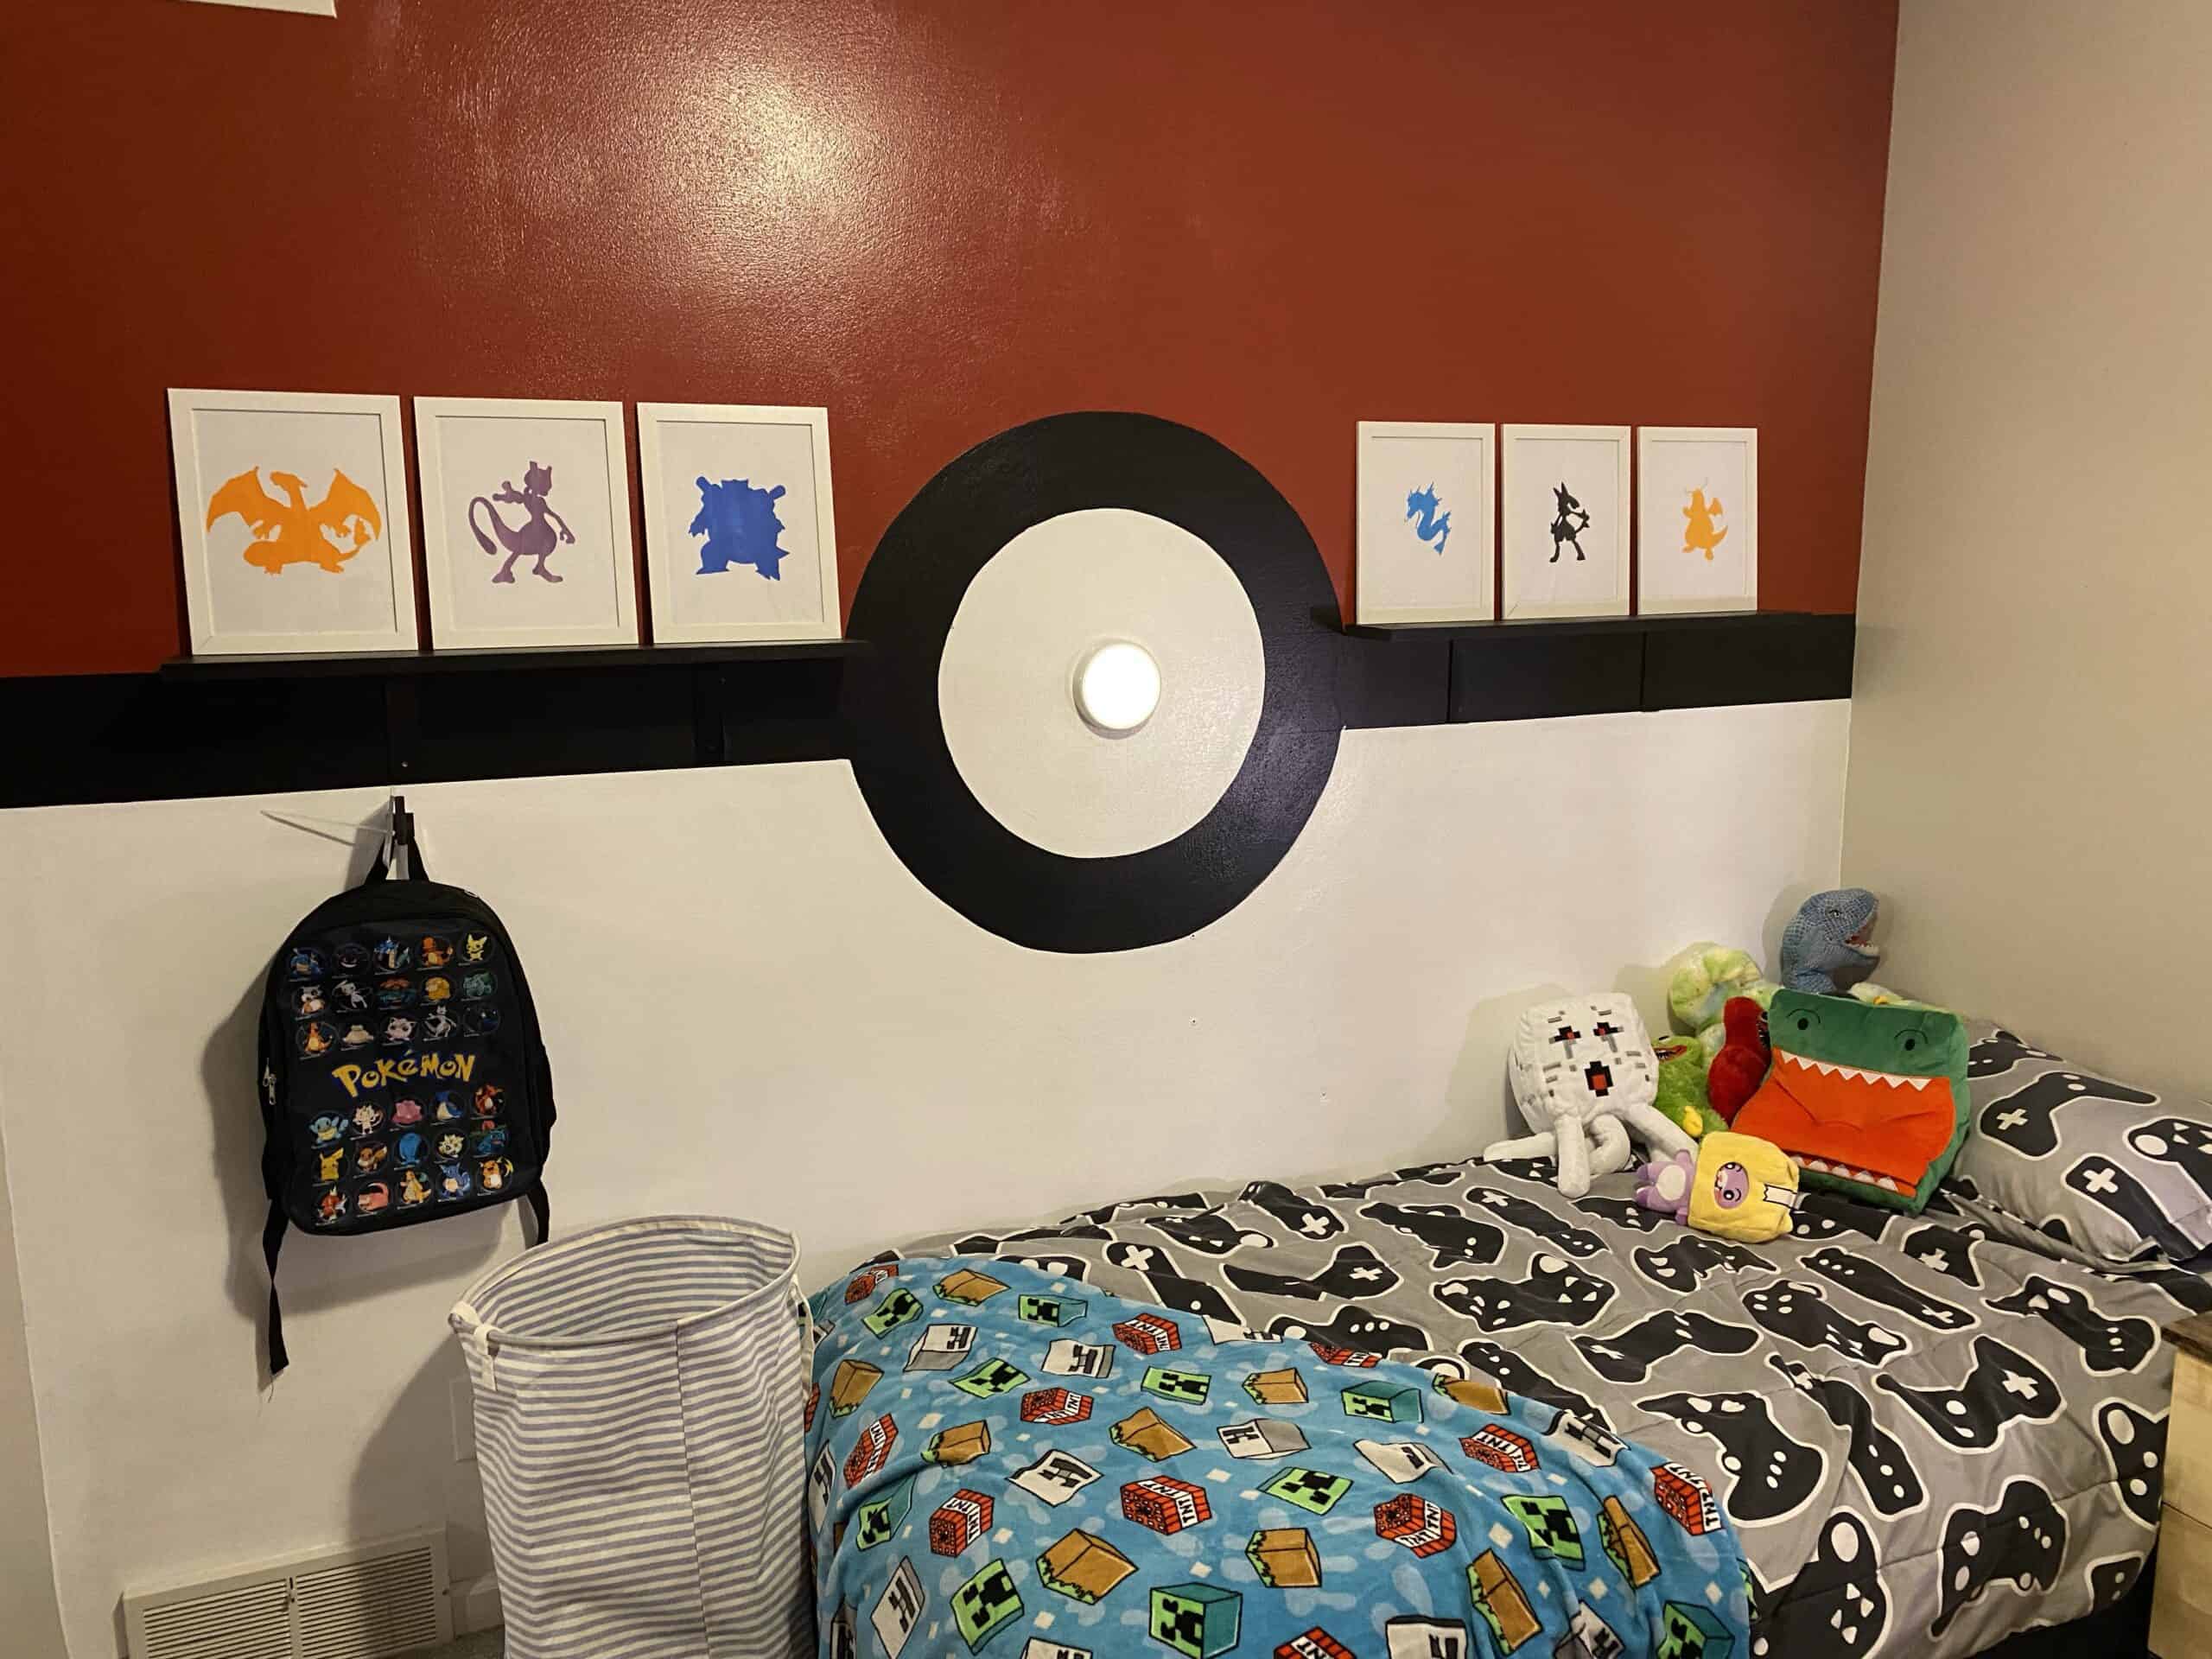
- I also add this cute hook for him to hang up his backpack.

- As a final touch I added this Battery Operated Tap Light so at night he could turn it on if he wanted to read in bed.
I think it turned out really cute! And the best part: He loves it!
Please SUBSCRIBE below to be notified when new project posts come out!
Happy DIY’ing!
Disclosure: Twohandsdiy.com participates in the Amazon Services LLC Associates Program, an affiliate advertising program designed to provide a means for publishers to earn fees by linking to Amazon.com and affiliated sites.
