
I wanted to update the look of my master bedroom, so I chose to go with a neutral bedroom and a dark accent wall. I wanted to add some interest with a chair rail and some other trim to look like paneling, and add some large mirrors.
The first thing was to come up with the design I wanted. I knew I wanted to have something in the middle of the wall to break up the space, so I decided I wanted 3 mirrors to be in the center, and then have raised trim to add texture to the wall. The final design I wanted for the wall was a large section in the middle, with two smaller sections on each side, and a chair rail splitting the top and bottom sections. See below for my design and how I figured out the measurements for the wall. The red rectangles are the mirrors. (Also – do you like the table in the video? I designed it myself using epoxy resin. Check out my complete before and after post on that project here).
This wall was a light grey before, and just kind of boring. I decided to paint the whole room, using Sherwin Williams Shoji White, but I wanted this wall to be a darker colored accent wall. I used Sherwin Williams Urbane Bronze for this color. I added the first coat of paint, and then prepared to add the trim pieces. I will apply the second coat of paint after the trim is up.

Using a measuring tape and a Sharpie marker, I marked the appropriate locations for the trim pieces based on the design I laid out in the video above. I added each trim piece, using a level as I went to make sure each piece was level and square. Each piece was attached using 3/4″ brad nails.


As I added the sections, I also used my level to make sure the horizontal pieces were level with each other (see below pic).

Each piece was measured, cut, and attached with brad nails.

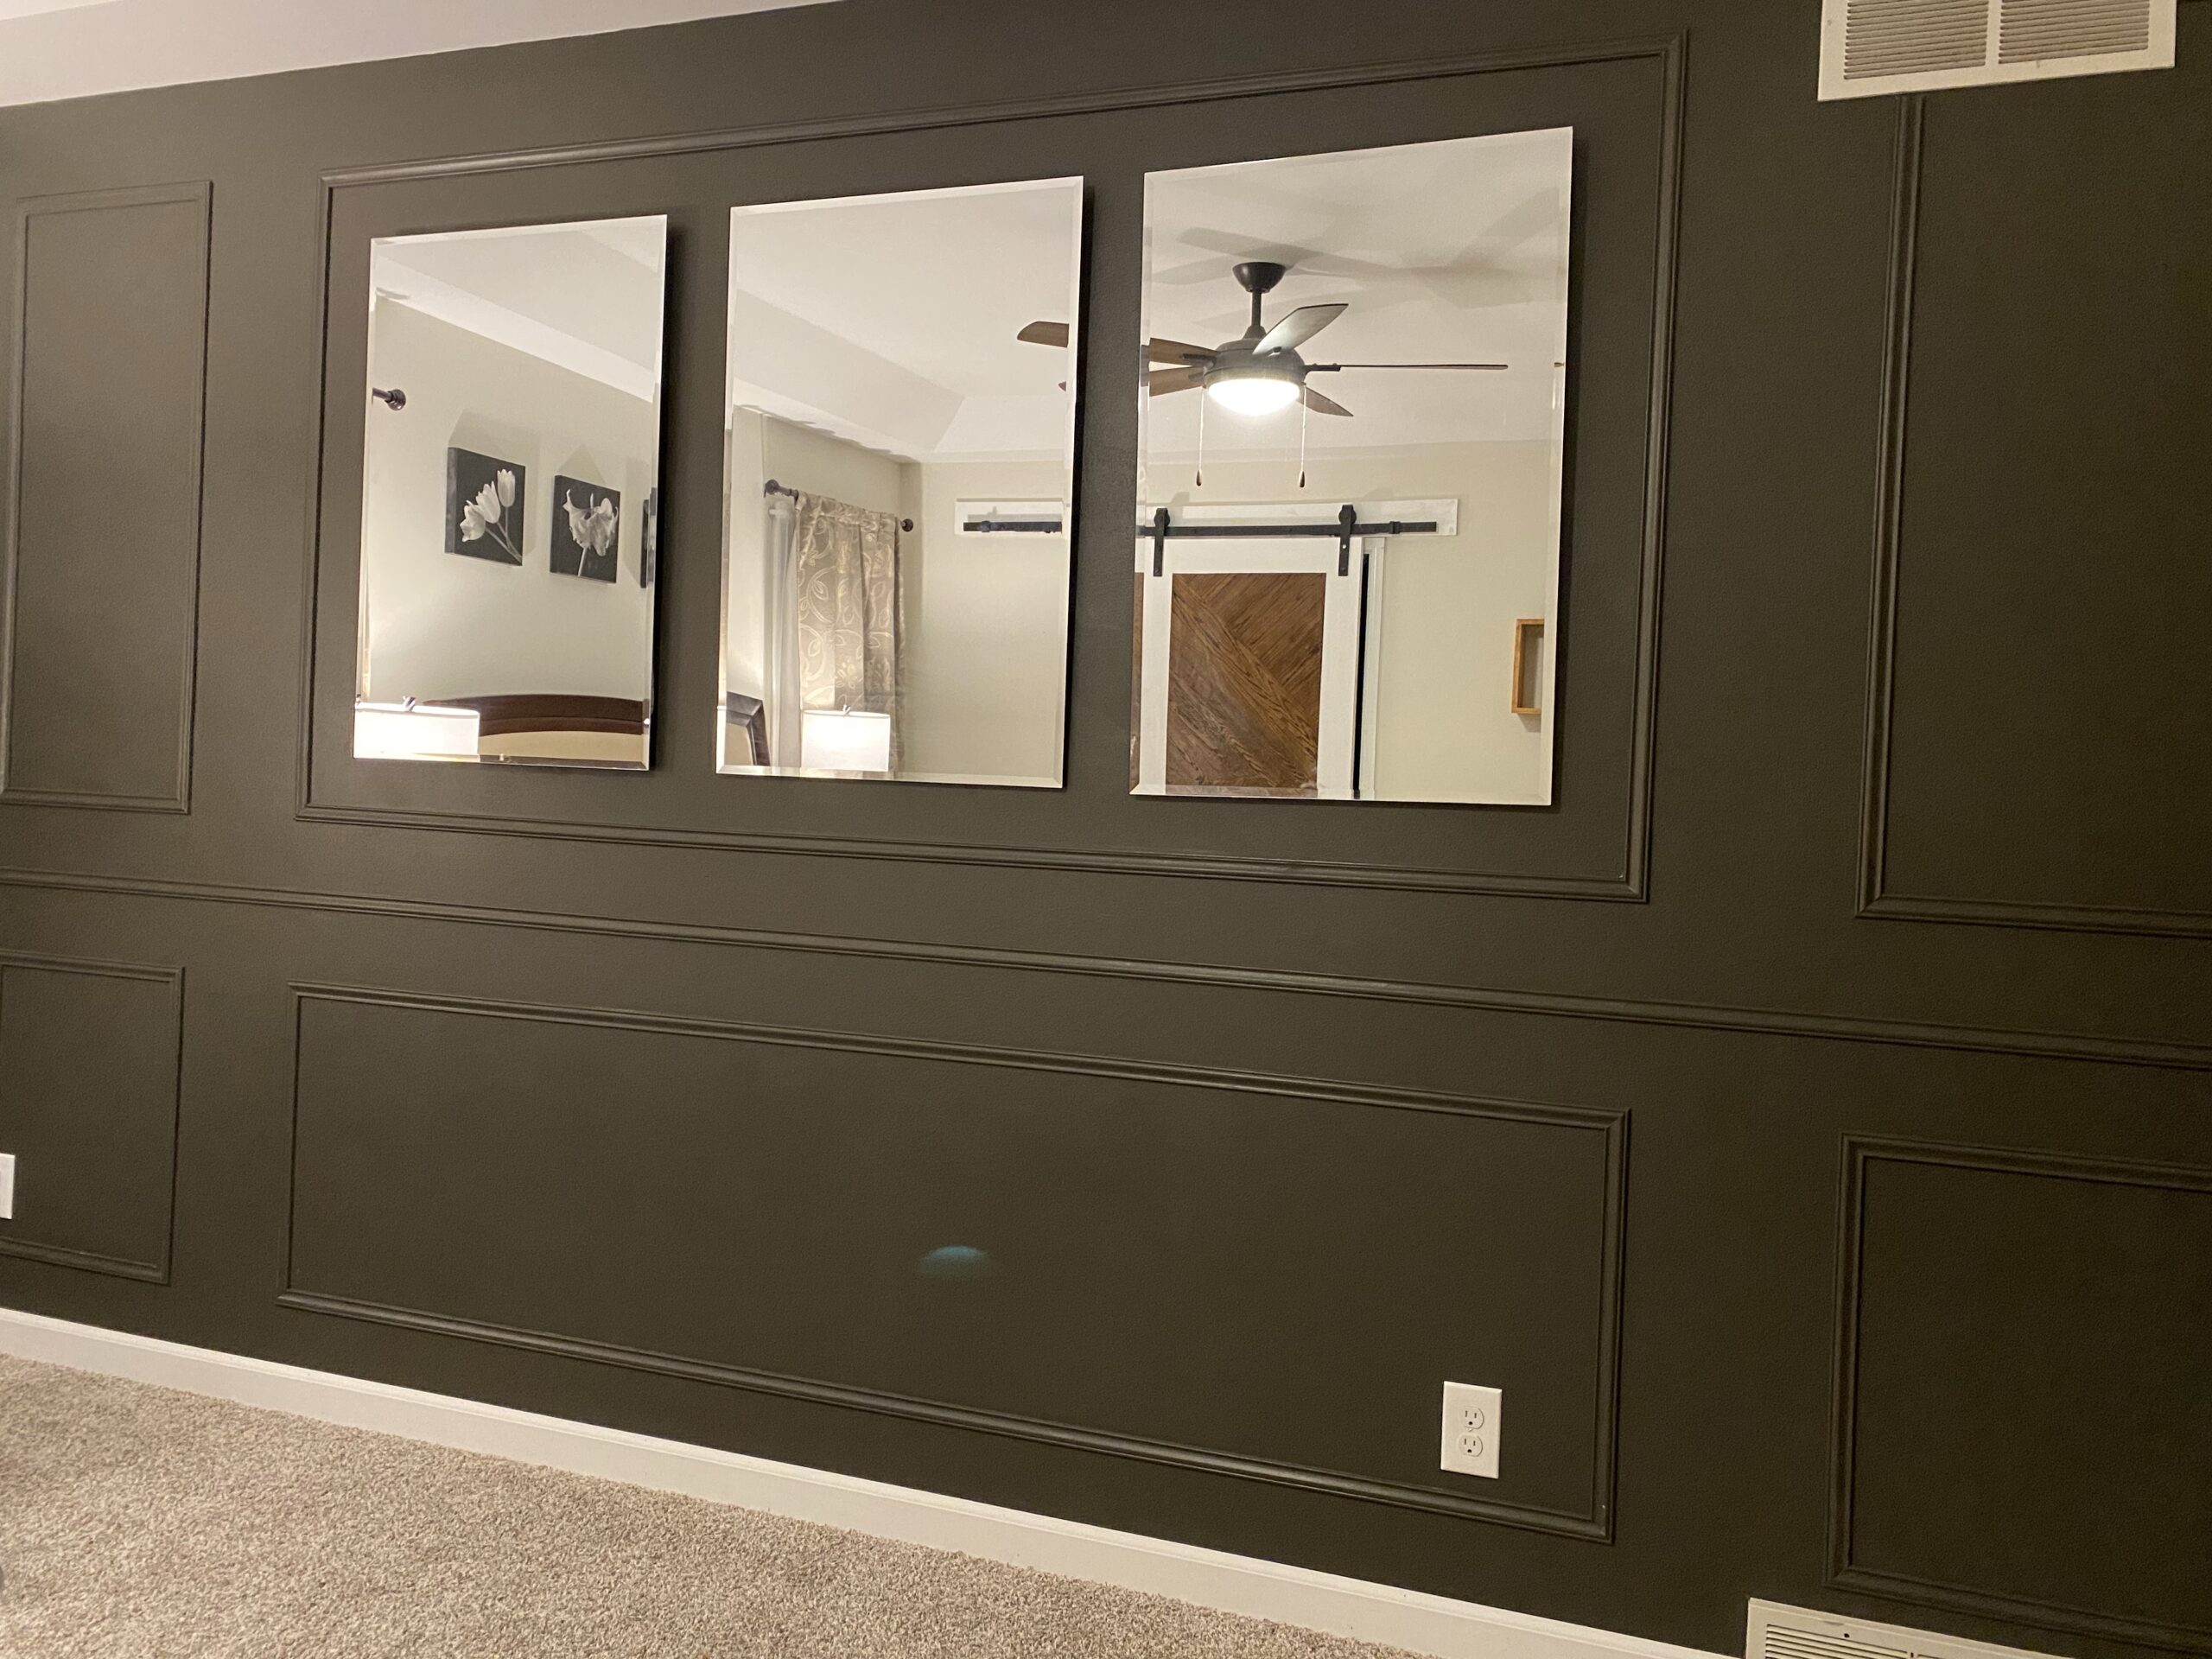
The mirrors came with little clips to secure them in place, you can see them in the picture above. Once I added them and got the mirrors up on the wall, I realized I didn’t like the way the clips looked, so it was back to the drawing board on how to secure the mirrors. In the mean time I caulked the seams of the trim. If caulking seems like overkill, or you aren’t sure how to caulk, check out my post on how and why to caulk trim seams.


I started to add the mirrors, which you can see in the picture above. Once they were up, I just didn’t really care for the way the clips looked at the top and bottom of the mirrors. When I removed the clips, I had to patch the holes, and figure out something else.

Here is the trim after the first coat of paint, and the mirror clip holes patched with drywall compound.
After doing some research, I decided to use crazy glue to attach some metal french cleat hangers to the back of the mirror. This way, the mirrors would have a “floating” appearance. See my post on how the mirrors were hung.

And the final reveal after the final coat of paint, mirrors hung, baseboard trim replaced, and the new carpet installed!
Check out my Master Bedroom Makeover post for the details on the full room updates!
Please SUBSCRIBE below to be notified when new project posts come out!
Happy DIY’ing!
Disclosure: Twohandsdiy.com participates in the Amazon Services LLC Associates Program, an affiliate advertising program designed to provide a means for publishers to earn fees by linking to Amazon.com and affiliated sites.

How to hang floating mirrors - Two Hands DIY
[…] out my post on adding the trim-work to the wall, or the complete before and after of this master […]
Master Bedroom Before and After: Extra cozy and bright! - Two Hands DIY
[…] Dark accent wall with picture frame molding […]
Chandra Canestraro
Thank you for your post. I really enjoyed reading it, especially because it addressed my issue. It helped me a lot and I hope it will also help others.
Williams Stiern
I enjoyed reading your piece and it provided me with a lot of value.